How to Use the ATmega328P-AU in Your DIY Electronics

The ATMEGA328P-AU microcontroller, built on the 8-Bit AVR Architecture, serves as a fundamental component in the realm of DIY electronics. Its ultra-low power consumption and versatile features make it an ideal choice for both hobbyists and professionals. Gaining an understanding of microcontrollers like the ATMEGA328P-AU enables you to develop innovative projects, ranging from simple gadgets to complex systems. By mastering this microcontroller, you unlock endless possibilities in electronics. For detailed specifications, you can refer to this datasheet.
Understanding the ATmega328P-AU Microcontroller
Features and Specifications of the 8-Bit AVR Architecture
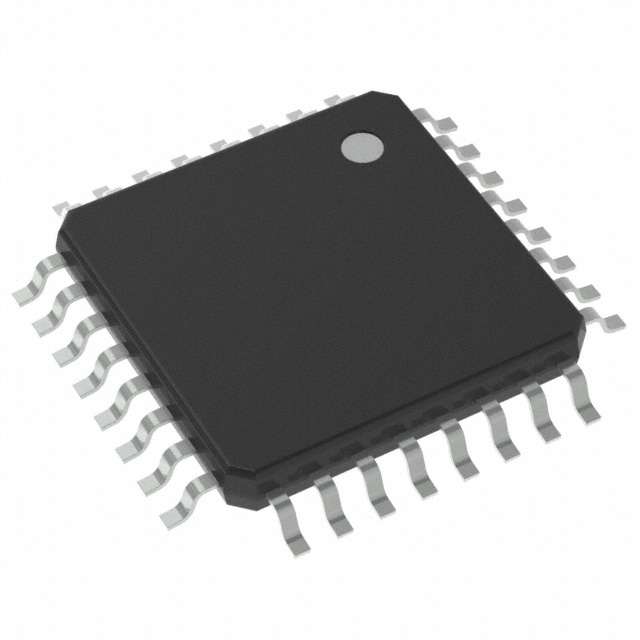
The ATMEGA328P-AU microcontroller, built on the 8-Bit AVR Architecture, offers a robust set of features that make it a popular choice for DIY electronics projects. You will find it in a TQFP-32 package, which provides a compact form factor suitable for various applications.
Pin Configuration
Understanding the pin configuration is crucial when working with the ATMEGA328P-AU. This microcontroller includes 23 input/output (I/O) pins, allowing you to connect multiple components and sensors. Identifying the orientation of the chip is essential. Look for the notch and dot that indicate Pin 1. This helps ensure proper connections and functionality in your projects.
Memory and Processing Capabilities
The ATMEGA328P-AU boasts impressive memory and processing capabilities. It features 32kB of flash memory, which provides ample space for storing your code. Additionally, it includes two 8-bit internal clocks, enhancing its processing efficiency. These features enable you to execute complex tasks and manage multiple operations simultaneously.
Applications in DIY Projects
The versatility of the ATMEGA328P-AU microcontroller makes it ideal for a wide range of DIY projects. Whether you're a beginner or an experienced hobbyist, this microcontroller can elevate your creations.
Common Uses
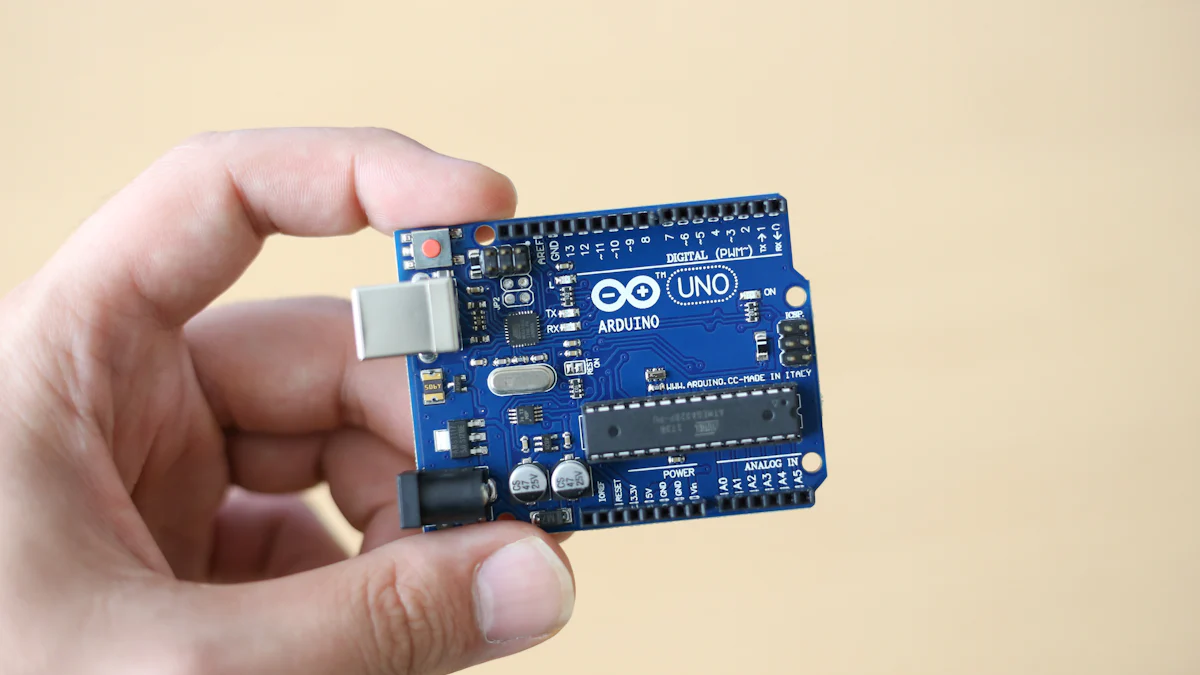
You can use the ATMEGA328P-AU in various applications, such as motor control, power regulation, and digital processing. Its compatibility with the Arduino IDE simplifies programming, making it accessible even for beginners. By flashing a bootloader onto the microcontroller, you can use it without an Arduino board, providing flexibility for standalone applications.
Advantages in DIY Context
The ATMEGA328P-AU offers several advantages in a DIY context. Its low cost and ease of use make it an attractive option for electronics enthusiasts. You can power it using a 5V supply, and it supports breadboarding, which facilitates easy prototyping and testing. Additionally, the microcontroller's ability to interface with sensors and actuators enhances the functionality of your projects, allowing you to create innovative and interactive designs.
For more detailed specifications, you can refer to this datasheet.
Preparing for Your Project
Gathering Necessary Components
To start your project with the ATmega328P-AU, you need to gather essential components. This preparation ensures a smooth workflow and successful project execution.
Microcontroller and Accessories
Begin by acquiring the ATmega328P-AU microcontroller. This component serves as the brain of your project. You will also need accessories like a USB ISP AVR programmer. This tool allows you to flash the bootloader and upload code to the microcontroller. Consider purchasing a crystal oscillator and capacitors. These components help stabilize the microcontroller's clock speed, ensuring accurate timing for your project.
Additional Electronic Components
In addition to the microcontroller, gather other electronic components. These might include resistors, LEDs, and sensors. These components enhance your project's functionality. Breadboards and jumper wires are also essential. They facilitate easy prototyping and testing. Ensure you have a 5V power supply. This powers the microcontroller and other components.
Setting Up Your Workspace
Creating an organized workspace is crucial for efficient project development. A well-prepared environment minimizes errors and enhances productivity.
Tools Required
Equip your workspace with necessary tools. A soldering iron is essential for connecting components. Use a multimeter to measure voltage, current, and resistance. This tool helps troubleshoot and ensure proper connections. Keep a set of screwdrivers and pliers handy. These tools assist in assembling and adjusting components. A computer with the Arduino IDE installed is also necessary. This software allows you to write and upload code to the microcontroller.
Safety Precautions
Prioritize safety in your workspace. Wear safety goggles to protect your eyes from soldering fumes and debris. Ensure proper ventilation to avoid inhaling harmful fumes. Keep a fire extinguisher nearby in case of emergencies. Avoid clutter in your workspace. This reduces the risk of accidents and makes it easier to find tools and components. Always disconnect power before making adjustments to your circuit. This prevents electrical shocks and damage to components.
By gathering the right components and setting up a safe, organized workspace, you lay the foundation for a successful DIY electronics project with the ATmega328P-AU.
Programming the ATmega328P-AU Microcontroller
Programming the ATMEGA328P-AU microcontroller involves selecting the right software and understanding basic programming concepts. This section guides you through the process, ensuring you can effectively program your microcontroller for various DIY projects.
Choosing the Right Software
Selecting the appropriate Integrated Development Environment (IDE) is crucial for programming the ATMEGA328P-AU. The IDE serves as the platform where you write, compile, and upload your code to the microcontroller.
IDE Options
Arduino IDE: This popular choice offers a user-friendly interface, making it ideal for beginners. It supports the 8-Bit AVR Architecture of the ATMEGA328P-AU and provides numerous libraries and examples to help you get started.
Atmel Studio: For more advanced users, Atmel Studio provides a comprehensive environment with debugging tools. It offers greater control over the microcontroller's features, allowing you to optimize your code for specific applications.
PlatformIO: This versatile IDE supports multiple platforms and microcontrollers, including the ATMEGA328P-AU. It integrates with popular code editors like Visual Studio Code, offering flexibility in your development process.
Installation and Setup
To install the Arduino IDE, visit the official Arduino website and download the version compatible with your operating system. Follow the installation instructions provided on the site. Once installed, launch the IDE and configure it to recognize the ATMEGA328P-AU microcontroller. You may need to install additional drivers or libraries, which are often available through the IDE's library manager.
For Atmel Studio, download the installer from the Microchip website. Follow the setup wizard to complete the installation. Configure the IDE to support the 8-Bit AVR Architecture by selecting the appropriate device settings.
Writing and Uploading Code
With the IDE set up, you can begin writing and uploading code to the ATMEGA328P-AU microcontroller. Understanding basic programming concepts is essential for creating functional and efficient code.
Basic Programming Concepts
Start by familiarizing yourself with the syntax and structure of the programming language used in your chosen IDE. In the Arduino IDE, you will primarily use C/C++ syntax. Key concepts include:
Variables: Store data that your program can manipulate.
Functions: Encapsulate code blocks that perform specific tasks.
Loops: Execute code repeatedly based on conditions.
Conditional Statements: Make decisions within your code using
if,else, andswitchstatements.
Experiment with simple programs to control LEDs or read sensor data. These exercises build your confidence and understanding of how the microcontroller interacts with external components.
Uploading Code to the Microcontroller
To upload your code to the ATMEGA328P-AU, connect the microcontroller to your computer using a USB ISP AVR programmer. Ensure the programmer is properly connected to the microcontroller's pins. In the Arduino IDE, select the correct board and port from the "Tools" menu. Click the "Upload" button to transfer your code to the microcontroller.
For Atmel Studio, use the "Build" and "Program" options to compile and upload your code. Verify the connections and settings to ensure successful communication between the IDE and the microcontroller.
By mastering these programming techniques, you can unlock the full potential of the ATMEGA328P-AU microcontroller. This knowledge empowers you to create innovative and functional DIY electronics projects.
Building Your DIY Project
Embarking on your DIY project with the ATMEGA328P-AU microcontroller involves designing a circuit and assembling components. This section guides you through these crucial steps, ensuring your project functions as intended.
Designing the Circuit
Creating a well-thought-out circuit design is essential for the success of your project. It helps you visualize the connections and components needed.
Schematic Creation
Start by drawing a schematic diagram. This diagram represents the electrical connections and components in your project. Use software like Fritzing or Eagle to create your schematic. These tools offer user-friendly interfaces and libraries of components. Include all necessary elements, such as resistors, capacitors, and the ATMEGA328P-AU microcontroller. Clearly label each component and connection. This clarity aids in the assembly process and troubleshooting.
Breadboarding Techniques
Once you have your schematic, transfer the design to a breadboard. Breadboards allow you to prototype your circuit without soldering. Insert the ATMEGA328P-AU microcontroller into the breadboard. Connect components using jumper wires. Follow your schematic closely to ensure accuracy. Test the circuit on the breadboard. Make adjustments as needed to achieve the desired functionality. Breadboarding provides a flexible platform for experimentation and refinement.
Assembling the Components
With a successful breadboard prototype, you can proceed to assemble the final version of your project. This step involves soldering components onto a printed circuit board (PCB) or a perfboard.
Soldering Tips
Soldering requires precision and care. Use a fine-tipped soldering iron for detailed work. Heat the joint and apply solder to create a secure connection. Avoid excessive solder, which can cause shorts. Work in a well-ventilated area to avoid inhaling fumes. Practice on spare components if you're new to soldering. This practice builds confidence and skill. Ensure all connections are solid and free of cold joints.
Testing and Troubleshooting
After assembling your project, test it thoroughly. Power the circuit and observe its behavior. Use a multimeter to check voltages and continuity. Verify that the ATMEGA328P-AU microcontroller operates correctly. If issues arise, refer to your schematic and breadboard setup. Identify and correct any discrepancies. Common problems include loose connections and incorrect wiring. Systematic troubleshooting ensures your project functions as intended.
By following these steps, you can successfully build a DIY electronics project using the ATMEGA328P-AU microcontroller. This process not only enhances your technical skills but also brings your creative ideas to life.
Finalizing and Testing
Finalizing your DIY electronics project with the ATMEGA328P-AU microcontroller involves ensuring its functionality and documenting your work. This stage is crucial for validating your design and sharing your achievements with others.
Ensuring Functionality
To confirm that your project works as intended, you need to conduct thorough testing and address any issues that arise.
Testing Procedures
Power On the Circuit: Connect your project to a power source. Observe the initial behavior of the components. Ensure that the microcontroller, built on the 8-Bit AVR Architecture, receives the correct voltage.
Check Component Functionality: Use a multimeter to measure voltages at various points in the circuit. Verify that each component operates within its specified range. Pay special attention to sensors and actuators, as they often require precise conditions.
Run Test Programs: Upload simple test programs to the microcontroller. These programs should check basic functions, such as blinking an LED or reading sensor data. Confirm that the ATMEGA328P-AU executes these tasks correctly.
Debugging Common Issues
Identify Symptoms: Note any unexpected behavior, such as components not responding or incorrect outputs. These symptoms provide clues about potential issues.
Check Connections: Inspect all connections for loose wires or incorrect placements. Ensure that the microcontroller's pins align with your schematic.
Review Code: Examine your code for errors. Look for syntax mistakes or logical flaws that could affect functionality. Use the debugging tools available in your IDE to trace the program's execution.
Consult Resources: If problems persist, refer to online resources or forums. Many enthusiasts share solutions to common issues with the ATMEGA328P-AU. You can also consult the datasheet for detailed specifications.
Documenting Your Project
Documenting your project serves as a valuable reference for future endeavors and allows you to share your work with the community.
Creating a Project Report
Outline the Project: Start with an introduction that describes the project's purpose and objectives. Include a brief overview of the ATMEGA328P-AU microcontroller and its role in your design.
Detail the Design: Provide a comprehensive description of the circuit, including schematics and component lists. Explain the functionality of each part and how they interact.
Include Code: Attach the source code used in your project. Comment on the code to clarify its purpose and logic.
Summarize Testing Results: Document the testing procedures and results. Highlight any challenges faced and how you resolved them.
Sharing Your Work with the Community
Publish Online: Share your project on platforms like GitHub or Instructables. These sites allow you to reach a wide audience and receive feedback.
Engage with Forums: Participate in electronics forums and communities. Share your experiences and learn from others who have worked with the ATMEGA328P-AU microcontroller.
Create Tutorials: Consider writing a tutorial or recording a video walkthrough. These resources help others replicate your project and inspire new ideas.
By finalizing and testing your project, you ensure its success and contribute to the broader DIY electronics community. Your documentation not only preserves your work but also encourages others to explore the possibilities of the ATMEGA328P-AU microcontroller.
You've now explored the ATmega328P-AU microcontroller and its potential in DIY electronics. This journey covered understanding its features, preparing your workspace, programming, and building your project. Key takeaways include the importance of planning, testing, and documenting your work. The ATmega328P-AU offers endless possibilities for innovation. Dive deeper into more complex projects and continue expanding your skills. The world of electronics awaits your creativity and curiosity. Keep experimenting and sharing your discoveries with the community. Your next project could inspire others!
See Also
Utilizing the HD6477043F28 Microcontroller for Your Projects
Incorporating TPS5430DDAR into Your Electronic Projects
Efficient Powering of Embedded Systems with MC68LC060RC50
Exploring STM8S003F3P6TR Microcontroller Uses in Embedded Systems